
5 Unity Tricks, Hacks & Secrets for Beginners (PC Focus)
Here are some AMAZING tips, tricks, hacks and secrets I learned over the years that I wish I knew when I first started out. They have saved me so much TIME and even some HAIR PULLING!!
1. F2 Key
Every time you have to edit any name for an object, be it a simple Game Object or even a file inside of the Project window, you have to either double click on it or go into the inspector window and edit the name. This one trick definitely helped save me some time simply by clicking on any file and hitting F2 on my keyboard I can instantly edit the name of the object or file! Give it a try now!
2. Visual Studio – Mass Commenting
This use to drive me bonkers back in the day, yes I’m one of those devs who use to COMMENT LINE BY LINE! And of course you have the block comment capability, but the trouble was that I needed line-by-line commenting to happen…That’s when I setup this neat little trick inside Visual Studio (This also normally works on many other IDEs but in Visual Studio you have to set it up manually):
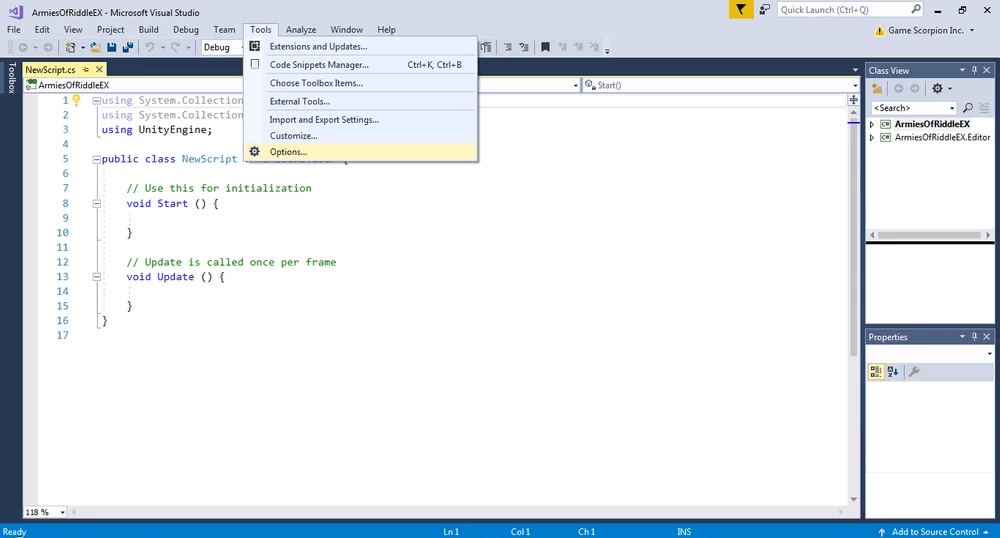
1. Go into Visual Studio and select Tools => Options
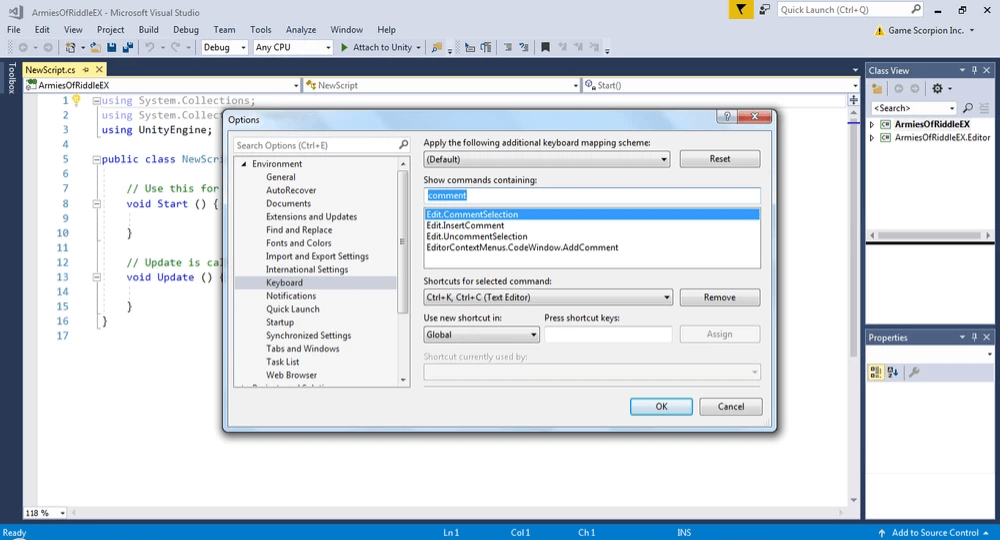
2. Select Environment => Keyboard and type in the word ‘comment’ in the box and select Edit.CommentSelection
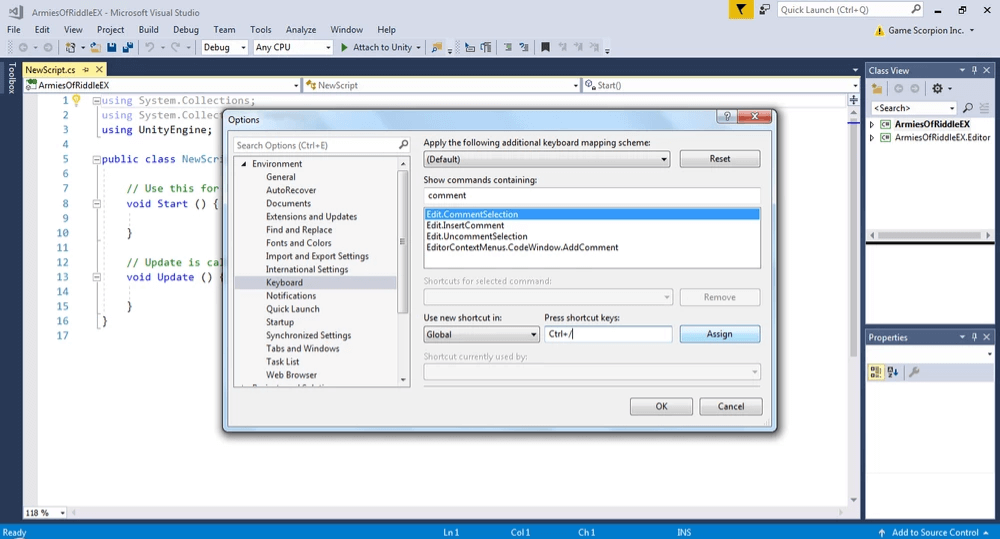
3. Remove the current shortcut by hitting the “Remove” button and then click on the “Press shortcut keys” box and hit CTRL + / (Thats Control plus Forward Slash) and click the Assign button
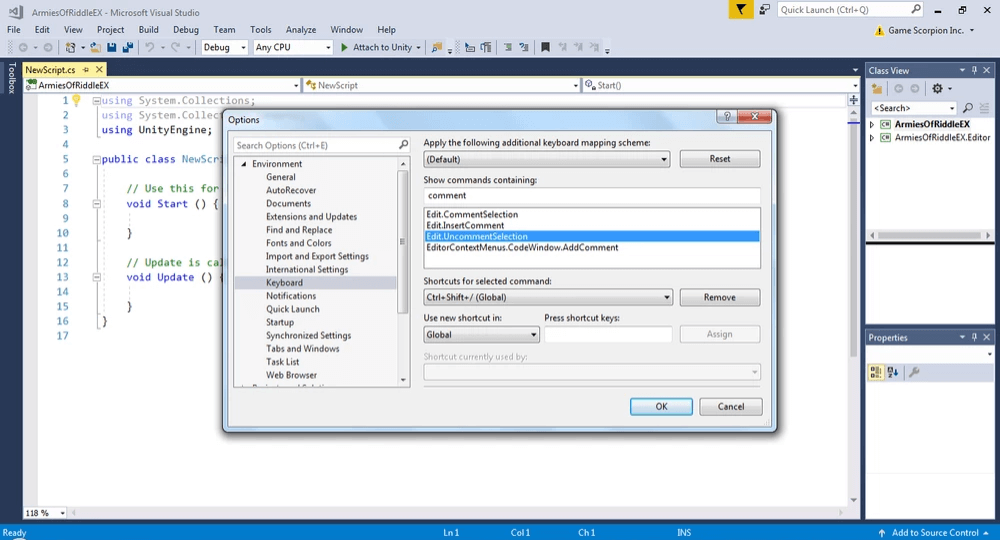
4. Repeat the process for the Edit.UncommentSelection but this time use CTRL + SHIFT + / (Thats Control plus SHIFT Key plus Forward Slash) and then hit assign
Now when you highlight ANY code blocks, simply use your two new commands to comment and uncomment entire blocks! This ONE hack has saved me countless hours and stress!
3. Visual Studio – Mass Variable Name Change
The last time you were in visual studio and had like 10,000 lines of code and then realized ” OH SNAP, That one variable is named so wrong, I have to change it…but there are like 1,392 instances of the variable 🙁 ”
Don’t despair! This one trick saved me hours if not DAYS of re-coding variable names! When I learned it I was literally like, “WHERE HAVE YOU BEEN MY WHOLE LIFE!!”
Here’s how it works:
1. Inside of visual studio highlight ANY variable name you want to mass change and press CTRL + R and then again CTRL + R (Thats right, Control plus R twice in a row back to back):
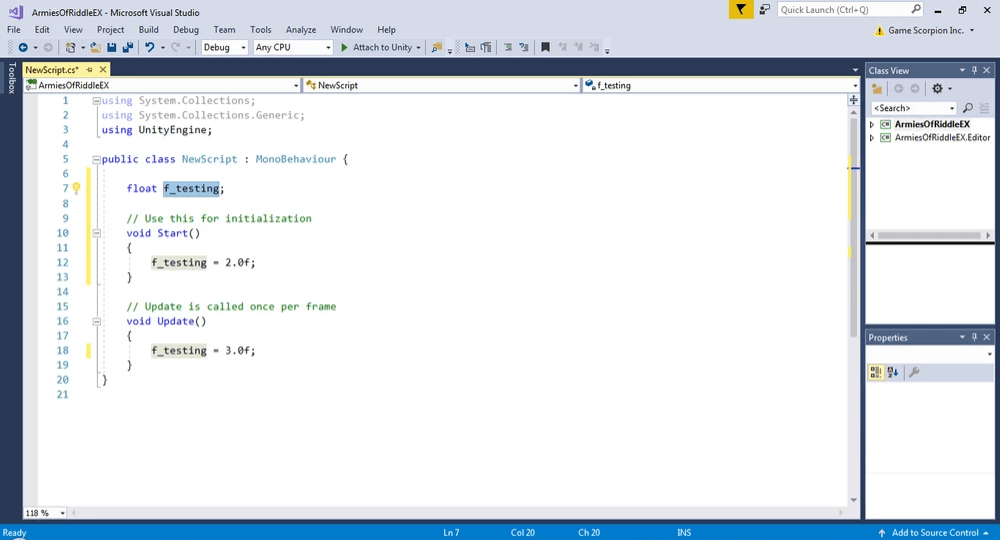
2. You then start typing out the changes you want to make to the variable and simply hit apply and BOOM! All variables in the entire script have been changed!

4. Unity Special Folders
This was during my early years using Unity 3D. Apparently there is a list of SPECIAL folders or MAGIC folders that do certain things when you create them. Here is the actual documentation on these special folders which I HIGHLY RECOMMEND you look at => https://docs.unity3d.com/Manual/SpecialFolders.html
One example is the Resources folders. These LITERALLY package everything inside them into your app/game. Be careful what you put in here as there have been many times I’ve had unused assets sitting inside these folders which ended up increasing my final file sizes. The difference in file size can be MASSIVE so definitely check this one out for sure!
5. Image Import Settings
Yes you’ve got awesome images, and yes you want the highest quality, but it doesn’t matter how big an image is if its taking up a tiny set of pixels on the screen! You don’t need to have high resolutions for items that themselves dont take up space real estate. I’ve made this mistake time and again when I’ve developed for an iPhone with button image sizes of 2048×2048 which were taking up an actual pixel space of maybe 256×256 or smaller! What’s worse is that many of these graphics had ALPHA set when they didn’t need it (thus requiring more system resources). So here is how you change these settings for optimal file size savings:
1. First select your image in the project view and then inside of inspector, change the Max Size down to an amount that you know the image will NEVER go to. For example if you know its a small button, having an image size of 4096×4096 would probably not be the best size.
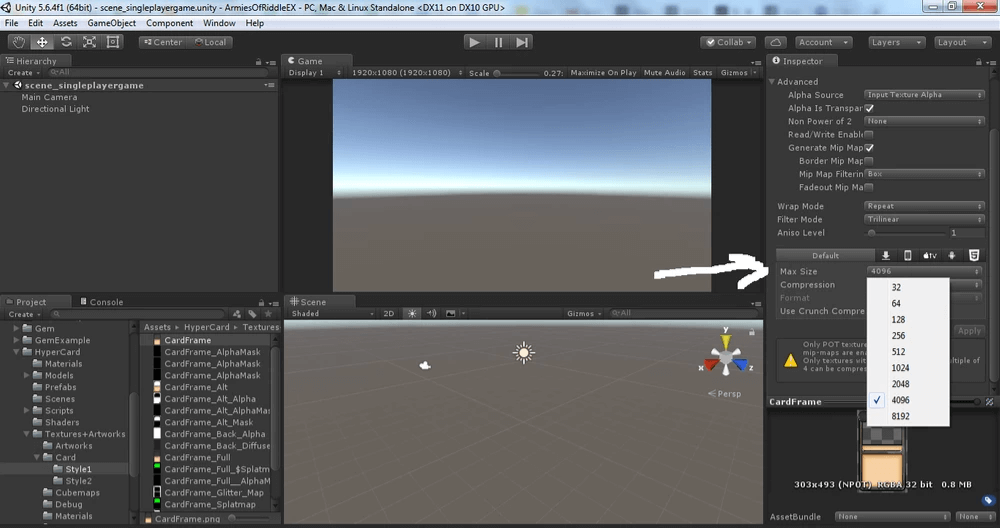
2. Next check to see if Alpha is Transparent is checked. ONLY use alpha settings if they are required or else there is no point and may take up valuable resources in rendering.
3. Finally, make sure your images are in SQUARE size. This specific size just makes things run faster and better (From my own results in the past) and I find that the textures come out more crisp and clean, which is important for 2D games especially.
Conclusion
Well there you have it, those are five things that should help you move forward in your overall development time. Keep on learning and growing and get better every day! You’ve got this! *FIST BUMP*…Now go make your hit game!!!
Nav is a Unity Live Expert and Mobile Game and App Developer
LEARN TO MAKE GAMES FOR FREE! => Watch Me Live On Twitch => https://www.twitch.tv/academyofgames0
“I’m a game dev making fun awesome RPG and Fantasy Games. Check out my games on Steam and all major mobile platforms today => Game Scorpion Inc.!”


Leave a Reply