Onboarding in Games – Learn 7 Tips For Onboarding and User Training
A good onboarding system can help build habits in your players that will keep them coming back to your game and enjoy it. Get it wrong and you’ll have players confused and even uninstalling your game!
Onboarding is the process of teaching or training users how to play your game. There are several types of onboarding and getting it right can mean the difference between a top title and a clearance rack!

TYPES OF ONBOARDING
GAME SPECIFIC
This is the most common type of onboarding process in which you teach your players how to play your game. Things that are new to them that they wouldn’t generally know are things you would teach them. For example if it’s a match 3 game, they may not know that a certain color bubble can activate a super power or that selecting 3 bubbles in a row will allow them to pop. These are the basics of YOUR game and so you must make sure you teach them in an easy way that it can be understood, even across language barriers.
INTUITIVE
This is a more advanced type of onboarding where players ASSUME something that they should be able to do in your game already. If it’s a mobile device, pinch to zoom in and zoom out is a good example of this. Another one is using the middle mouse scroll button to zoom in and zoom out. Things that normally a hardware system has as normal operation should be things you should easily account for in your game.
AUDITORY
This is an AUDIO ONLY onboarding experience where players hear sounds (it could be a character or a computer voice or something that trains them with audio) and then take action based on those sounds. Things such as a computer saying, “Move your army to the red square” or “If you press the up button on the keyboard, the player will move to the top” are examples of an auditory onboarding.
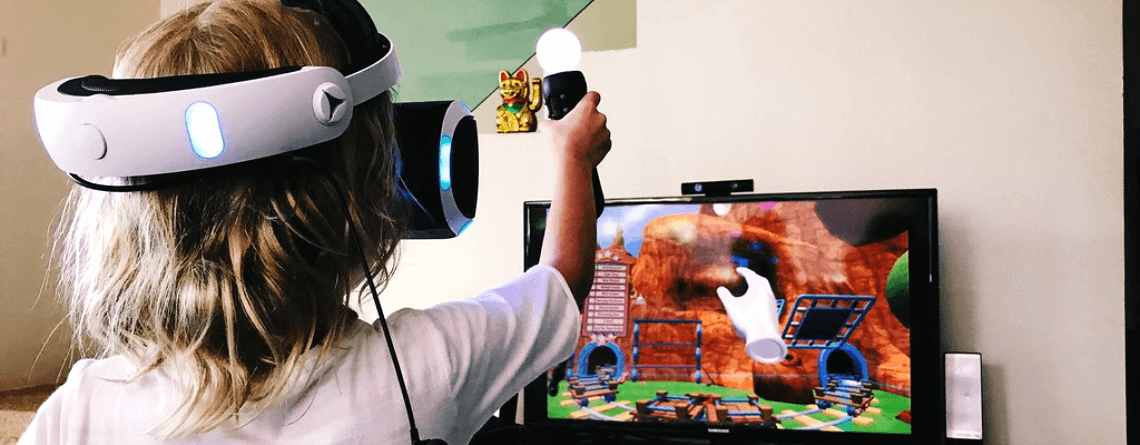
VISUAL
Visual onboarding is when a player can VISIBLY see something. This could be in the form of a button glowing or arrows pointing the user in the right direction, etc. Visual onboarding is very important and is generally used in conjunction with other onboarding methods here.
There are several other types of onboarding however these are ones that you will commonly encounter. Now lets break into some tips that can help you to make a stellar onboarding system!

1. FOCUS ON THE BASE GAME FIRST – STORE AND ADS LAST
This is one that many developers seem to swap around (Especially new developers learning about onboarding). I get it, you want to make money, but if your main focus on teaching players is to first teach them your store or teach them how to use the ad system to get free lives after watching an ad video, then your game is really not that good and I’d recommend going back to the drawing board to figure out why. Players have come to your game FIRST AND FOREMOST to play your game. Teaching your store and your ad revenue streams are the last thing, if at all, and I highly recommend staying clear from teaching any of those items first.
I recommend teaching the base game play first, then advanced gameplay, followed by store last and if you really REALLY need to, the ad system. Always remember that if you push your players too hard to see ads and miss out on the gameplay, they will simply uninstall your game for a comparable one that is not so pushy and thus you lose your user. FOCUS ON THE GAME FIRST!

2. THREE (3) TO SEVEN (7) ITEMS PER TRAINING!
When you are teaching your player how to play your game, stick to teaching them only 3-7 things. The human mind can only take on around a handful of items at a time, so if your game has like 50 weapons and 40 super powers, teaching it all to players would not be the best thing to do. Focus on three to seven items and break your tutorials and trainings into several onboarding trainings using that PROPORTION of items in each training. It’s easier for a player to learn a few things first and then several more items after, so keep that in mind and have a progression as you train your users.
A good example would be as follows: If your game is an FPS shooter game, you could start off by teaching around 3 items, namely moving, shooting and how to do actions (Such as a single command that opens a door or picks items up or does other actions all with the same command, usually the letter E on the keyboard in many FPS shooter games on PC). Then after that you’d do a second tutorial training on something like using a new weapon and then how to find a key and clear a level and even how to destroy an enemy. Over time your player would have learnt how to play your game and would find more value from it rather than if you had bombarded them directly with too much information!

3. REDUCE COMPLEXITY
If you’re dealing with a very complex game, reduce the complexity down to make things easier on the player. For example, if the game is a car racing game, instead of having a long extensive track, for the onboarding process, simply have a short round track that allows the player to experience the basics. If it’s a strategy game, instead of having a full map, simply have a mini map with shorter distances and fewer enemies.
The point is, the easier you can make your onboarding tutorial in complexity, the easier it will be to ramp up and teach your players a more advanced full version of your game. In League of Legends for example, instead of 3 lanes, they use a single lane to train players on how to move and play the game. This is a great example of reduced complexity in your onboarding. Give it a try!

4. NEAR IMPOSSIBLE TO DIE
Another area that you want to watch out for is giving your players chances to make mistakes. If your player can die in your first tutorials, chances are they are not going to be coming back. Some of the best tutorials never let their players die (Even though the player THINKS they can). Allow players to make mistakes as they learn your game!
Too many new developers who just start out in trying to do an onboarding forget this major point and thus players rarely learn and end up leaving the game because they died and never really learnt how to play. Now you’ll be prepared for this!

5. FIRST 30 SECONDS!
You have the FIRST 30 SECONDS to make an impression! You must put the player into a SUCCESS state within that time psychologically. The best onboarding I’ve seen has players win battles and win all kinds of goodies and praise.
Remember, players are coming to a game to get away from the real world. They want to have fun and in the first 30 seconds if you can’t deliver a great hit of success and fun to them, they are going to leave!
Do something amazing with the players, have them win, give them bonus items, make them feel like superstars, wow them with graphics and sounds and much more! If you can do that right, players will stick around in a game and give it a chance.
6. TEACH YOUR STORE LAST
After you’ve taught players how to play your game and they are happy, give them a chance to learn how to make a purchase by teaching them your store. Ofcouse this is the LAST item as the game itself must be the main focus, however having this is an important part to monetization. If you can teach your players how to use your store and make purchases they are more likely to do so!
Give them a free item using the same purchasing pipeline. For example if players need to hit the shop icon and then go and select an item in the shop and hit the pay button, have them do this process but give them their first item for free. This will teach them where the store is and also how to buy things.
As I said, this is an important item but not as important as the main game. Focus on the game first and your store last!

7. MIX IT UP
You don’t need to follow things exactly like others have. It’s okay to mix up the training and tutorials to fit your specific game and genre. Experiment with various onboarding pipelines and see what works best for your players. Ultimately ask yourself if you are getting the results you want (More players playing your game, less players leaving your game, and a healthy monetization, along with any other KPI items you are tracking).
Have fun with it, but make sure you have an onboarding system inside your game! In today’s world of gaming it is hard to compete without having this important element in your game titles.
CONCLUSION
Well there you have it, those are some tips to help you with the creation of your onboarding systems in your games. Feel free to come watch me live on twitch where I teach game development and these same training’s using the top games such as League of Legends, Starcraft II, Hearthstone, Overwatch, Fortnite and many other top games! https://www.twitch.tv/academyofgames0
Until next time, keep on grinding at the code 🙂 You’re a super star!! Keep up the great work and NEVER GIVE UP! You Got This!! BE A CHAMPION!
Nav is a Unity Live Expert and Mobile Game and App Developer
LEARN TO MAKE GAMES FOR FREE! => Watch Me Live On Twitch => https://www.twitch.tv/academyofgames0
“I’m a game dev making fun awesome RPG and Fantasy Games. Check out my games on Steam and all major mobile platforms today => Game Scorpion Inc.!”


Leave a Reply